What is fashion retouching?
The process of enhancing fashion photographs by eliminating distracting elements is Fashion Retouching. Fashion photos without retouching look pale and colourless. Perfect retouching is all about choosing the right tools. Hence you need high-end retouching services to retouch your fashion photos to convince the customers to buy your product.
Retouching fashion photos like a professional requires a lot of patience and experience. Here are some tips that are useful in retouching fashion photos like an expert in Adobe Photoshop.
- The top most rule to ace Fashion Photo Retouching is to keep it natural. Applying tons of layers and masks will make the photo look plastic and pull down your reputation as a professional. Before starting retouching, examine the photo quickly and note the flaws you need to work on. Doing this will speed up your workflow and help you retouch multiple photographs in less time.
- Although you retouch flaws, you should not retouch marks that are meant to make the photo beautiful. In case the model has birthmarks or beauty spots, do not correct them. Do not cover the pores on the face thoroughly. Keep the texture intact, and professional retouching is all about how well preserved the photo is.
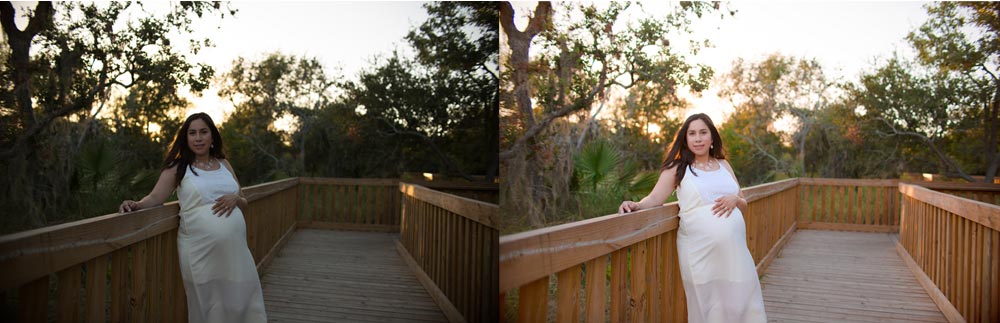
- White Balance- White balance in photos is set to make the colors look more natural. When you adjust your white balance to the color temperature of the scene, that is when you have done it right. To apply the white balance tool, look for Image > Adjustments > Curves on the top left corner. A Curves dialog box pops up. Hover on the eyedropper tools to find the white point for white balance. Now choose the whitest spot on the photo and select it. Try increasing the exposure of the photo by moving the curves bar diagonally. You have the white balance in your control. Hence adjust it accordingly.
After white balance, you have to focus on black points and grey points next to the white point eyedropper tool. Play around with the options in the curves dropbox. Doing this will provide a beautiful feel to the photo. To understand white balance perfectly, buy a color checker or a grey card. A color checker is a card that helps understand color accuracy in case you are working with high-contrast photos.
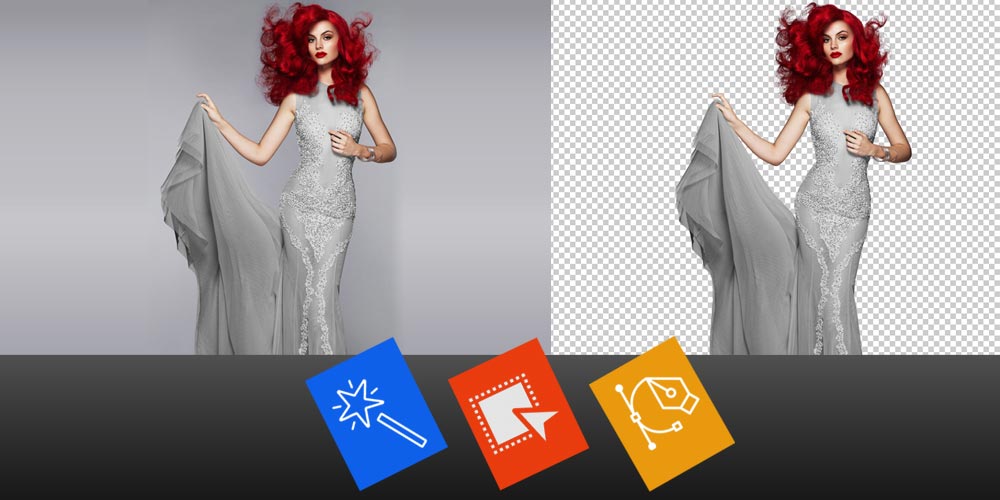
- Changing background: There are different tools to remove background in Adobe Photoshop. If the background is a solid color, then use the Magic Wand tool. If there is only one subject in the photo, then use the Select Subject option. This tool automatically selects and separates the background. If there are multiple subjects in the photo, use the Object Selection tool to select the subjects. If the subject is complex and the automatic tools are not being handy, go for the Clipping Path. The pen tool under the clipping path helps you to select corners carefully and separate the background.
- Color correction- For color correction in the photo, use the Selective Color Adjustments layer in the Properties section. Focus on the bright colors like yellow, red, etc. Now add the Hue/Saturation layer to saturate the vibrant colors. Next, use the curves layer to boost the mid tones to twerk the contrasts. For some photos, we encounter colors that are unnatural. To blend the color into the photo, we use Clipping Path. Part of the photo is selected for color correction instead of using the tool for the entire photo.
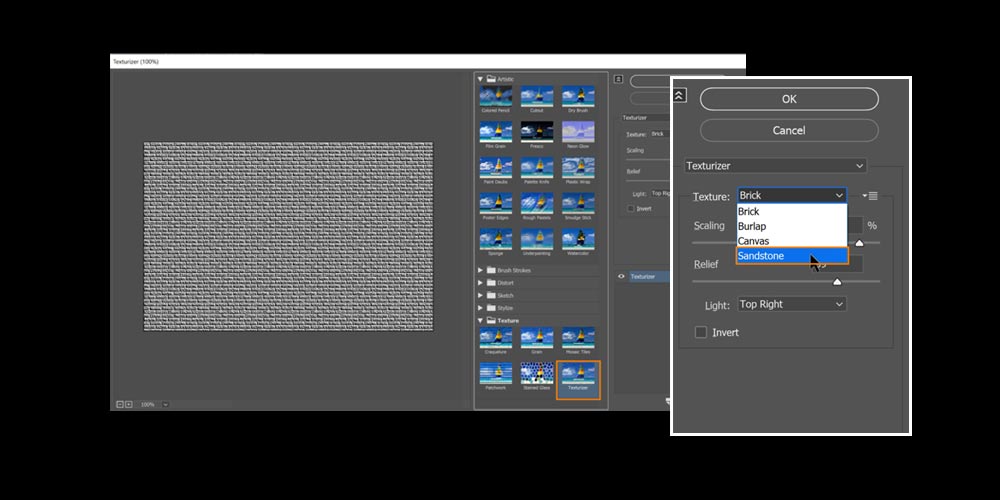
- Skin texture improvement- Firstly, create a new layer and name it “Skin Texture.” Select the Fill option from the Edit menu. Under Fill dropbox select Contents > 50% Gray > Ok. Next, right-click on the layer to select Convert to Smart Object. The Smart Object allows us to retouch non-destructively. Then select Filter > Filter gallery and open the texture folder. Now select Texturiser and apply the sandstone template as it looks similar to the skin. You can select Light based on your photo’s lighting. Now blend the “Skin Texture” layer with the original photo using the Soft Light Blending mode. Finally, select the Brush tool and select foreground color as white, and reduce the opacity to 15%. Paint over the skin to apply the Skin Texture.
- Shadow and marks removal- Removing unnecessary shadows, blemishes, and marks is easier with the Spot Healing Brush tool. This tool understands the surroundings and blends the flaws or objects with the surroundings. Select the Spot Healing Brush tool to the spot you want to remove and brush over the surface. The tool will automatically replace the spot according to the surroundings.
Sometimes the surroundings are vivid, and the Spot Healing Brush tool does not do a good job. Then use the Lasso tool to select the areas you do not want to include while the Spot Healing Brush is copying.
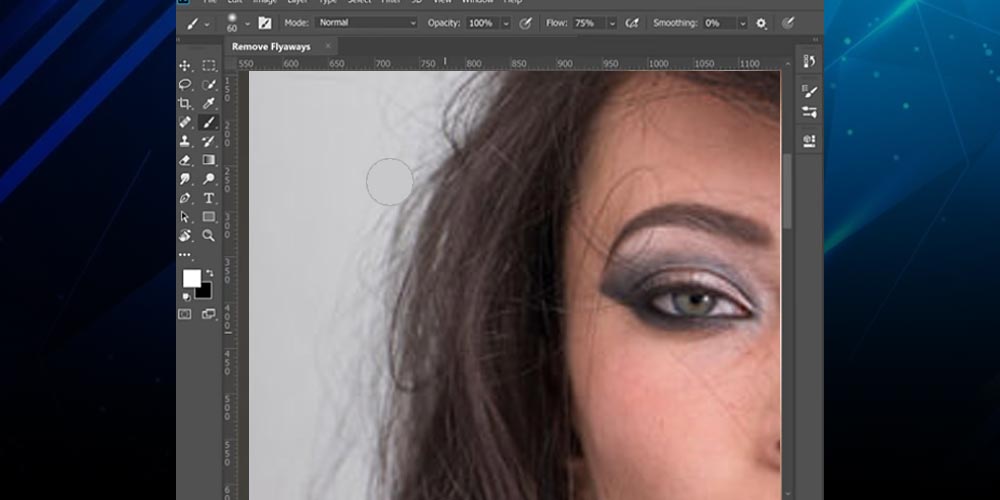
- Flyaway hair- Flyaway hair is a challenging task for every photo retoucher. Sometimes flyaway hair is very frizzy that the hairspray could not fix it. And it is difficult to decide which strands of stray hair to remove. As professional fashion retouchers, use frequency separation by applying a texture layer to the original photo and then remove the hair from the texture layer. This technique is used when the background is diverse. Likewise, use the Healing brush to retouch individual hair strands to regionally select skin to replace the hair strands.
- Remove wrinkles on clothes- To remove unwanted wrinkles or folds on the fabrics in your photo, you can use Frequency Separation. First, create two layers, “Low” and “High,” above the actual photo. Select the Low layer and in the Filter menu, select Blur > Gaussian Blur. In the Dialog box, increase the Radius value till you stop seeing the fabric properly. Now, take away the Low frequency layer from the High frequency layer to only use the High frequency layer. Select Image > Apply image > Layer[low frequency] > Blending[Subtract] > Scale=2, Offset=128 > Ok. Next, change the blend mode from Normal to Linear Light.
Doing this process mimics the original image, but we will see the difference if we look closer. Now select the “Low” layer, using the mixer brush tool(without changing the settings) brush over the wrinkled fabric to remove the wrinkles and folds. Retain some of the folds to make the fabric look realistic.
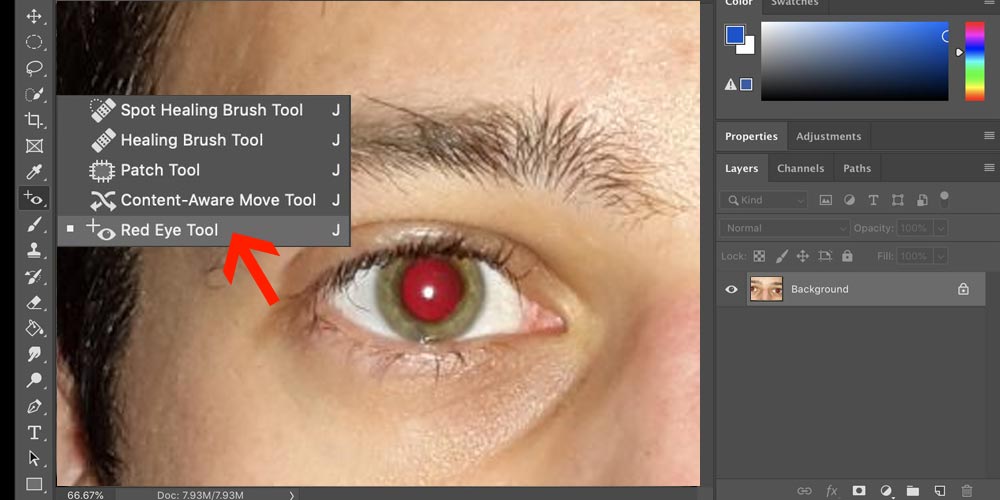
- Red-eye removal- Red eyes are a common problem while clicking pictures. To replace redness in the eyes with normal white eyes, we can use the Spot Healing Brush tool. After selecting the tool, click on the Red-eye tool. For better results, set the Pupil size and Darken amount to 50%. Now, drag the mouse to position the square over the pupils of the High End Beauty Retouching. The redness in the eyes will be restored to look whitish normal, and the iris will look beautiful.