
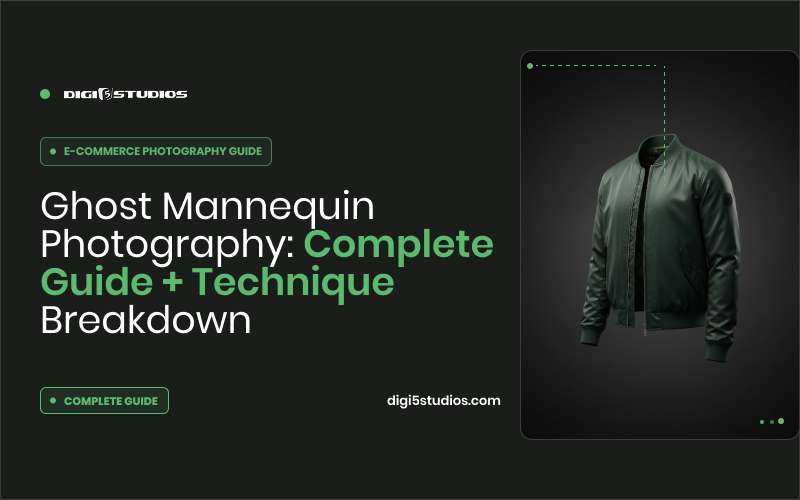
The shirt looks like it’s being worn by someone who isn’t there. No head, no arms, no mannequin poking through the collar — just the garment, holding its shape like a person stepped out of it mid-photo.
Look at any apparel listing that actually converts and you’ll notice something odd about the photos. That’s ghost mannequin photography, and it’s one of those techniques that looks like a small detail until you compare it to the alternative.
The alternative, for anyone who hasn’t tried it, is a flat garment laid on a table or hung on a hanger, looking about as appealing as laundry. Customers can’t tell how it drapes, whether the collar sits right, or what it’ll actually look like on.
That gap — between “photo of fabric” and “photo of a garment that looks alive” — is what this guide is about.
What ghost mannequin photography actually is
Ghost mannequin photography is a technique where a garment is shot on a physical mannequin, then the mannequin is digitally removed in post-production while keeping the garment’s natural, filled-out shape. The result is a piece of clothing that appears to float on an invisible body: full sleeves, proper collar structure, correct drape, no visible mannequin anywhere.
It goes by a few names depending on who you ask — invisible mannequin, hollow man, or neck joint photography. All describe the same core idea. You’re not photographing an empty garment. You’re photographing a garment on a body, then editing the body out while keeping every wrinkle, fold, and shape decision the body created.
That distinction matters. A garment photographed flat and the same garment photographed on a form look like two different products. Volume changes everything about how clothing reads visually, and getting that volume right without a visible mannequin is the entire point of ghost mannequin editing.
Why it beats flat lays and model shots
Online apparel sellers have exactly one job when it comes to photography: help a shopper imagine wearing the item without being able to touch it. Ghost mannequin photography solves a specific piece of that problem better than almost any other approach.
A model shot shows fit on one body type — which can work against you if the shopper doesn’t share that body type. A flat lay shows the garment but flattens all its dimensionality. This technique splits the difference. It shows true 3D shape and drape without tying the image to any specific model’s proportions, skin tone, or styling choices.
It’s also just efficient at scale. A studio can shoot dozens of garments on the same handful of mannequin sizes in a single session, rather than booking models for every SKU. For catalogs running into the hundreds or thousands of items, that difference in production time is enormous.
And there’s a returns angle that most sellers underestimate. A shopper who can see how a collar sits and how a hem falls is a shopper less likely to send the item back because it “looked different online.”
How the technique actually works
Here’s where a lot of guides get vague, so let’s walk through it properly.
-
The base shot
The garment goes on a mannequin and gets photographed from the front, with the mannequin’s visible parts — head, hands, base — either already removed or easy to isolate later. This is your primary shape reference.
-
The interior shot
This is the part people miss. The photographer lifts the collar or hem and shoots the inside of the garment, capturing the interior neckline, lining, or waistband that the mannequin’s neck would otherwise hide. Without this shot, you can’t create a convincing hollow opening at the collar. No amount of editing skill fixes a missing interior frame.
-
The merge
In editing, the interior shot is blended into the collar or hem area of the base shot, filling what would otherwise be an empty black hole where the mannequin’s neck used to be. Done well, this transition is invisible. Done poorly, you get a visible seam or an oddly flat patch that gives away the whole illusion.
-
Cleanup and background
Remaining mannequin edges, stand marks, and rig shadows get removed, and the garment is placed on a clean — usually pure white — background to match marketplace standards. This stage overlaps heavily with clipping path work, since the garment still needs a precise cutout before it can sit on any background.
For garments with sleeves — jackets, long-sleeve shirts, sweaters — this process often needs additional interior shots at the cuffs, since sleeve openings have the same hollow-hole problem as the collar. Each extra opening is another joint, and each joint adds editing time.
Which garments this works best on
The technique is the same across a catalog. What changes is how much the garment cooperates.
Structured outerwear — jackets, blazers, coats
The best-case scenario. Defined shoulders, a stiff collar, and enough body to hold shape mean the invisible-person effect reads as completely natural. Usually needs neck plus both cuffs, so it’s a multi-joint job, but the payoff is the most convincing result in the category.
Dress shirts and polos
The classic use case, and the one most buyers picture when they hear the term. The collar is the whole story here — a clean neck joint on a crisp shirt sells the garment’s construction better than any description does.
Knitwear, sweaters and hoodies
Texture is the challenge. The interior fill at the collar has to match the knit’s grain and shadow, not just its colour, or the neckline looks like a flat sticker pasted into a woven surface. This is where inexperienced editors get caught out.
Trousers, skirts and bottoms
Waistband joints instead of neck joints, plus the added problem of two leg openings that both need to read as hollow. Symmetry matters more here than anywhere else — a slightly off waistband is immediately visible.
Where it’s less useful
Extremely thin, drapey fabric that doesn’t hold form on a mannequin the way it does on a body — very lightweight scarves, unstructured knits that collapse without support. For those, most brands mix ghost mannequin shots with flat lays or on-model photography depending on the piece.
Where ghost mannequin photography goes wrong
Four things separate a convincing invisible mannequin shot from an obviously edited one:
- Visible neck joint seams. The interior shot doesn’t match the lighting or colour of the base shot, so there’s a faint line or colour shift right at the collar.
- Asymmetry. The two sides of the garment don’t line up, because the mannequin shifted slightly between the base shot and the interior shot.
- Ghosting artifacts. Faint outlines of the mannequin’s shoulders or stand still visible around the edges.
- Flat interior fill. The collar area looks like a pasted-in patch instead of genuine fabric with its own shadow and texture.
None of these are rare mistakes. They show up constantly with editors who are rushing or don’t have real experience with this specific technique. Worth knowing before you assume any photo retoucher can handle it.
Red flagIf a vendor only shows you finished hero shots, ask for a full-resolution crop of the collar area. That single detail is where the work either holds up or falls apart — and it’s the easiest thing to hide in a downsized portfolio image.
Three scenarios from real catalogs
A shirt brand shot 200 SKUs without the interior frames
The photographer captured beautiful base shots and skipped the collar-lift shots entirely, assuming editing could fill the gap. It couldn’t — there was no interior fabric to blend in. Every listing needed either a fabricated collar that looked pasted, or a reshoot.
Result after fixing the shoot brief: one photography pass, no reshoot on the next season.
A knitwear label got flat collars back from a generic retoucher
The neck joints were technically seamless, but the interior fill had no knit texture and no shadow — so the necklines read as smooth plastic against a chunky cable weave. Customers couldn’t articulate the problem; they just didn’t trust the photos.
Result after specialist re-edit: texture-matched joints across the full range.
A DTC brand mixed three editors on one seasonal drop
Each editor blended collars slightly differently — one tighter, one softer, one with a marginally warmer interior tone. Individually every image passed. Side by side on a category page, the range looked assembled from three different brands.
Result after moving to one team with a written spec: visual consistency across 400+ garments.
The pattern in all three: the neck joint wasn’t the visible problem. It was the invisible one underneath the visible problem.
DIY or outsource?
You can absolutely attempt this in-house if you already have studio lighting, a mannequin set, and someone comfortable in Photoshop with layer masking and blend modes. It’s a learnable skill.
What it isn’t is fast to learn well. The neck joint blend alone — matching lighting, colour, and texture between two separate shots — takes real repetition to get consistently right. A brand shooting five products a month might reasonably keep this in-house. A brand shooting five hundred a month will burn through a lot of editor hours, and a lot of imperfect first attempts, getting there.
That’s usually the point where outsourcing starts making financial sense. Not because the technique is impossible to learn, but because the learning curve costs more in time than most catalogs can absorb.
Send us the garment you think will break the technique
The chunky knit. The satin blouse. The jacket with three joints. Three images, hand-edited, back within 24 hours. No payment, no commitment, and you keep the files either way.
What to check before you outsource it
If you’re sending garments out for this, confirm a few things upfront:
- Do they specialise in apparel, or is ghost mannequin one small line item buried in a generic retouching menu?
- Can they show real neck-joint crops at full resolution, not just finished hero shots where the hard part is easy to hide?
- What’s the turnaround on a batch? Apparel catalogs move in seasonal waves, not a steady trickle, and a vendor sized for trickle will miss your drop date.
- How do they price multi-joint garments? A t-shirt with one neck joint and a jacket with neck plus two cuffs are not the same job, and any vendor quoting one flat rate for both hasn’t thought it through.
- Will they work from your spec sheet? Interior tone, shadow treatment, crop ratio and background should be locked in writing before bulk processing starts.
Send a handful of test garments before committing to a full catalog. A specialist should be able to show you a clean, seamless result on your own product rather than asking you to take their word for it.
Ghost mannequin photography FAQs
What is ghost mannequin photography?
A technique where a garment is shot on a mannequin, then the mannequin is digitally removed in post-production while keeping the garment’s filled-out 3D shape. The clothing appears to float on an invisible body.
What’s the difference between ghost mannequin, invisible mannequin and hollow man?
Nothing — they’re three names for the same technique. “Neck joint” refers specifically to the collar blend, which is the hardest single step in the process.
How do you shoot for the ghost mannequin effect?
Two shots minimum: the garment on the mannequin from the front, and a second frame of the interior neckline with the collar lifted. Sleeved garments usually need interior shots at the cuffs too. Skip the interior frames and no editor can save the image.
Which garments work best with this technique?
Structured pieces that hold their shape — jackets, blazers, dress shirts, sweaters, hoodies, anything with a defined collar or waistband. Very lightweight, unstructured fabric that collapses on a mannequin is a poor fit.
How much does ghost mannequin editing cost?
Pricing goes by the number of joints and garment complexity rather than a flat per-image rate. A single-neck-joint t-shirt is the cheapest case; a jacket needing neck plus both cuffs costs more. Ask any vendor to quote against your actual mix.
Can AI do ghost mannequin editing?
Automated tools can remove a mannequin outline. What they consistently miss is the interior fill — matching lighting, colour and fabric texture at the collar so the opening reads as real cloth rather than a pasted patch. That blend is still a human job.
The bottom line
Ghost mannequin photography isn’t a gimmick. It solves a real problem: showing shoppers exactly how a garment holds shape and drapes, without the cost of model shoots or the flatness of laid-out product photos. Get the technique right and the clothing does the selling on its own. Get it wrong and every visible seam or asymmetry chips away at how trustworthy the whole listing looks.
Whether you build the skill in-house or send your catalog to a team that already has it, the standard should be the same: clean joints, matched lighting, and garments that genuinely look like they’re being worn by someone who just isn’t in the frame.
Digi5Studios treats ghost mannequin editing as its own specialty rather than a generic add-on. Interior and exterior joins, neck joints and hollow man effects, every blend checked by an editor before it reaches you — with 24-hour standard turnaround, NDAs on request, and a dedicated project manager who keeps your collar treatment identical from the first garment to the five-hundredth.
