Choosing the correct lighting pattern is essential in product photography and Photo Retouching Services; however, deciding what pattern(s) to use can be challenging. This post will clarify any confusion by outlining five essential lighting patterns for Product Retouching photography.
Short Lighting
Short lighting can be used to highlight the main features of a product. It is often used to accentuate the shape of an object, such as a bottle or a vase. A short lighting setup highlights the critical aspects of your product, making it easy for customers to see what they are purchasing.
Short lighting works best when there are few other elements in the shot (ideally just the product and its setup). The more complex your background and other elements, the more difficult it is to shoot a short lighting setup successfully.
The most important thing when using short lighting is knowing what you are doing. You need to take control of your camera settings without having too much ambient light for it to look good.
 Broad Lighting
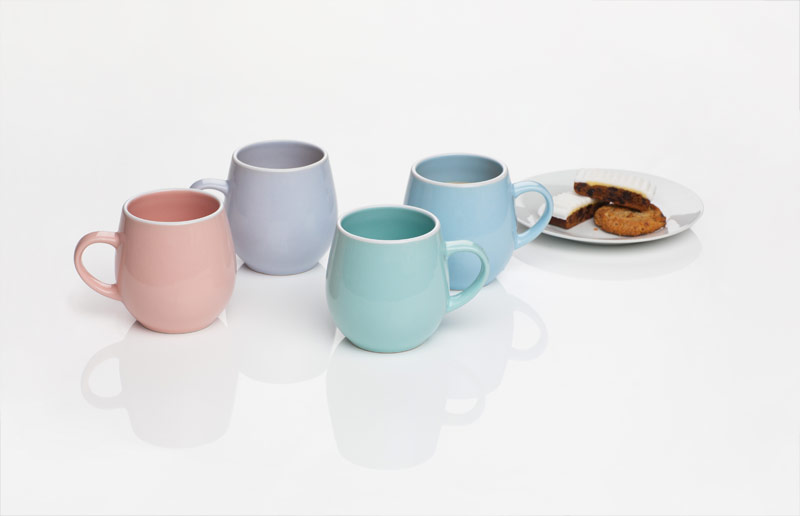
Broad lighting is the best for most product photography. The light source should be about 1 to 2 feet from your subject and fall on the centre of your subject’s body. This lighting pattern gives you a nice catchlight in your subject’s eyes and soft shadows around their face. Here’s how to set up broad lighting:
Place an off-camera flash or a continuous light source between you and your subject, so it falls directly on their body.
Set the flash to 0 lux output. This means that it will not fire unless there is enough ambient light to trigger the sensor, which will result in a very dark image with no shadows.
Broad lighting is the most common lighting pattern for product photography. The main components are ambient light, backlight, and rim light.
Ambient Light: Ambient light is the natural light that falls on a space. This can be achieved by using a large window or skylight as the background or multiple reflectors to create a bright spot in the corner of an otherwise dark room.
Backlight: Backlight casts an intense direction toward your subject. It’s ideal for highlighting shapes and creating shadow details in a photo.
Rim Light: Rim light is a secondary source of illumination used to illuminate objects on a side-lit background. It gives pictures depth and makes people pop out from their surroundings by highlighting their features against their surroundings.

Butterfly Lighting
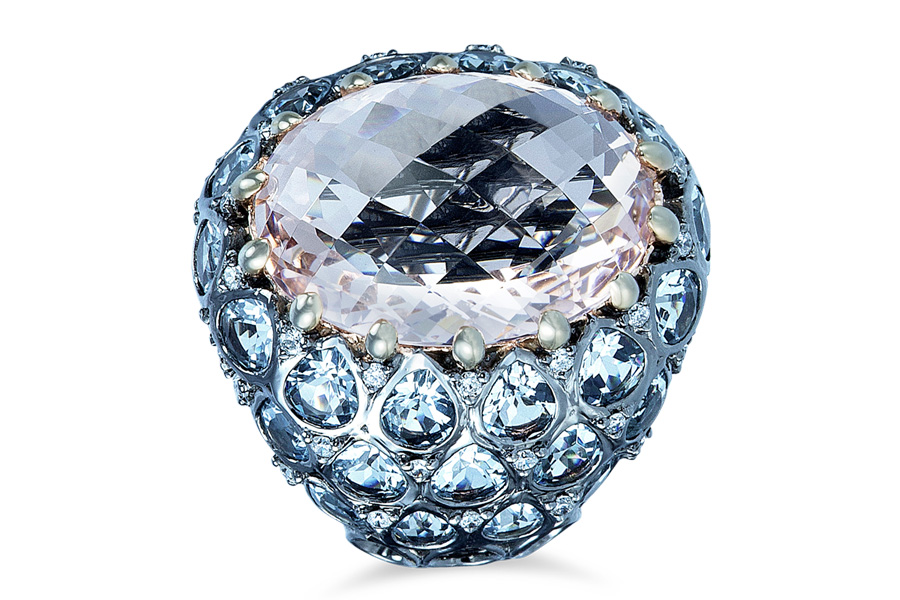
Butterfly lighting is a type of lighting in which the light source is positioned at the top of the frame, creating a soft and diffused light that makes your subject seem to hover above the background. The main advantage of butterfly lighting is that it creates an intimate look and feel as if your subject is floating in midair.
Butterfly lighting can be achieved by using multiple softbox lights or just one shoot-through umbrella. To get this look, place the light source above your subject’s head and point it down at them from behind. For best results, use a medium-sized softbox with a diffuser panel or grid to get the desired effect with less light than you would use on your own.
Split Lighting
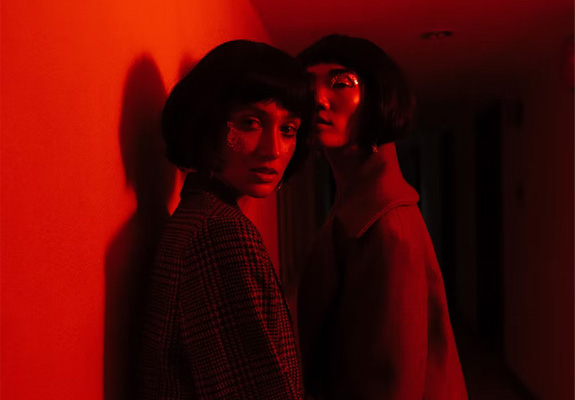
Split lighting is a great way to add depth and dimension to your product photography. It’s also easy to set up, requires no extra equipment or equipment setup, and can be done anywhere.
Split Lighting Tutorial:
Find a soft box with a diffuser on it to help spread the light across your product.
Place your product on an angle so that it’s not flat against the wall but tilted towards you at about 45 degrees or more. This will give you more light on one side of the product than another and create some separation between elements by placing them at different angles and distances from each other.
Set up your light source behind the product using either a Speedlight (preferred) or an exposure modifier if you’d prefer to use natural light instead of flash in this setup. Try to get both sides of your subject evenly lit with the same ambient light around them, then use a bare bulb for fill light on one side and another for fill on the other side if needed (e.g., reflector).
Loop Lighting
Loop lighting is one of the most popular lighting patterns for product photography. It’s easy to set up and produces a nice, even light on your subject. You can use loop lights in many ways, from placing them above your subject to creating a circle of light around it.
Loop lighting is great for product photography because it allows you to create smooth and even shadows across your subject without worrying about shadows or highlights. You can also use loop lights as a backdrop for larger objects, like furniture or props.
Wrapping Up
When it comes to ECommerce Retouching product photography and advertising, lighting is critical. Therefore, choosing lighting patterns can significantly affect your final images. One of the most important things to consider when choosing a lighting pattern for product photography is its directionality (and distance from the subject).