
It is not easy to run an automotive dealership. You’ll need to market your autos with high-quality images in addition to selling them. If you want to advertise vehicles on your websites and many other online advertisements, this is a must.
The fact is that a large portion of car consumers base their purchasing decisions on images. This requires dealerships to take and display appealing photos of their automobiles. This interesting blog will walk you through the many mistakes photographers make while photographing the interiors and exteriors of automotive. Let’s master the art of taking great automobile photos.
Automotive Photography
Capturing images that captivate the eye and tickle the viewer’s imagination is an art form. Few have perfected the art of doing so. Automotive photography is just what it sounds like, but it’s also a lot more. The key is to strike a proper balance to leave a lasting impression.
Top 10 Mistakes to Avoid in Automotive Photography
Photographing at Poor Angles
As an automotive photographer, you want to emphasize the car’s essential use while enhancing its appearance. You need to find the greatest angles for your shoot to produce incredible images. The amount of life you bring to your car photo and how effectively your angles determine the lines and design of your car show. Shooting cars from unfavourable perspectives can jeopardize these objectives.
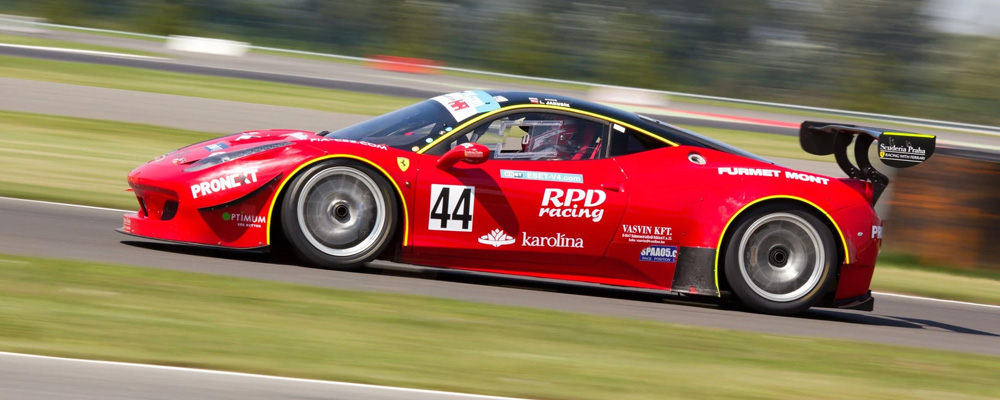
Shooting from directly in front of the automotive, for example, limits you from photographing the car’s outlines, shadows, and depth. It’s the biggest blunder an automotive photographer can make. Not only that, but it also inhibits you from employing the panning technique to emphasize the speed of a moving car. It’s no surprise that this is the least attractive view.
Wrong camera settings
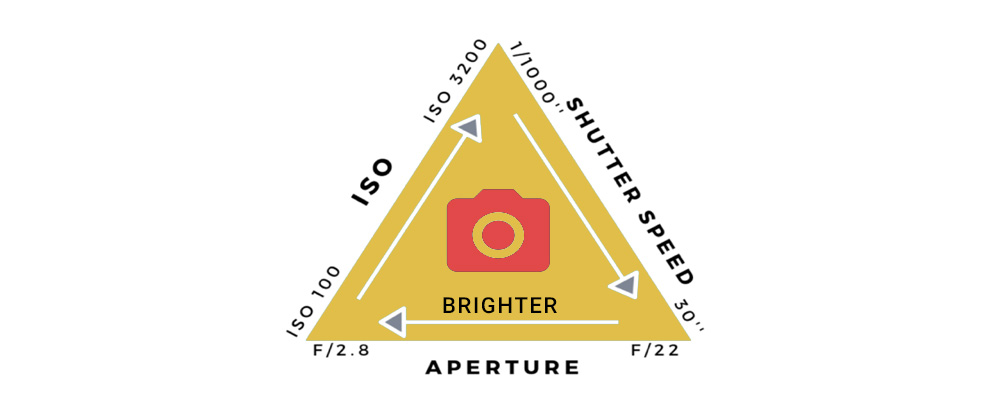
Rookie photographers’ shots usually end up with blurry photos, too dark backgrounds, or too much background. Photographers specializing in digital photography understand that varying ISO, aperture, and shutter setup are required for diverse conditions and environments. Many photographers struggle to find the right mix of shutter speed, ISO, and focal point, resulting in poor-quality photographs. Different settings are required for driving and stationary photos. Similarly, the settings for images taken in direct sunlight and automotive photos made in a studio are different.
Messing with Shutter speed
The shutter speed controls the brightness of an image and whether it appears to be moving or still. Set the camera’s shutter speed to somewhere between 1/200s and 1/500s if the car is motionless. Configure the shutter speed to 1/100s if the automobile is moving and you want to depict motion.
You must adopt the panning technique combined with this setting to achieve the sharpest picture and produce motion blur. Set the camera’s shutter speed to 1/1000s or greater if the automobile is in motion and you want to freeze the moment. Image blur will result if you capture the car with a slower shutter speed. Slower shutter speeds can also be tried to see which one works best.
Remember the RAW format.
The highlights are burned out when photographing automobiles in JPEG format, and the darks are dulled. The RAW image data file contains more details, resulting in larger file size. If the image is shot in RAW, the burned highlights and crushed darks can be partially repaired in post-production.
Lighting is everything
Even if you can adapt to the surroundings, good lighting may make or ruin a photo. Shooting in rapidly shifting light can result in a fuzzy and unclear image, so experiment with different lighting settings to determine what works best. Long exposures have the added benefit of allowing you to capture stunning images during both the blue and golden hours. Due to the initial low level of natural light during the blue hour, you may not even require an ND filter.
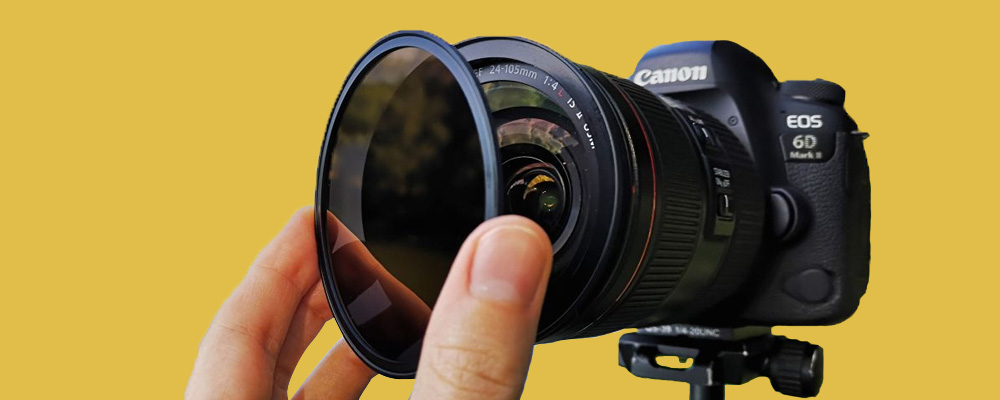
Not choosing ND filters.
The ND filters are a must in landscape automobile photography. A neutral density (or ND) filter limits the amount of light that reaches your camera sensor at all wavelengths without altering the colors. This is particularly beneficial for long exposure photography, which involves a large amount of light striking the camera sensor over a lengthy period of time. An ND filter can aid with this and prevent overexposure and obtain a cleaner image. ND filter comes in a variety of strengths, from light to dark, and each is tailored to different situations.
Not making use of “Reflectors.”
Reflectors such as mirrors, white sheets, white walls, ceilings, and massive panels are frequently used as large reflectors in automotive studio photography. But don’t forget that the floor can also be used as a giant reflector. Large mirrors or polished metal sheets can also be used to create light in certain areas. It will be nearly impossible to get a light underneath the floor facing up at the car without a glass floor.
Relying too much on Photoshop
If you shoot with a digital camera, you almost certainly use post-processing software to modify your images – particularly if you shoot in RAW format. However, if correcting something in post-production is something you rely on, you should reconsider your methods. And besides, a RAW photo that has been fully processed in photo retouching services software nearly always looks better than it did when it was taken. It would be best if you did not shoot with the intention to edit it later when you can fix it right away.
Read More: – What are the Career Options available for Photo Retouching Professionals?
Improper ISO settings
Images with an incorrect ISO are grainy. Period. You can adjust your ISO to a certain setting based on the lighting. The Auto ISO setting with limitations is another option. All cameras may not support this ISO limiting option. If your camera supports it, you can set the highest ISO value. After setting it, your ISO value will not exceed the chosen limitation amount if you use the automatic ISO mode.
Underestimating Depth of Field
Considering vehicles can be many meters long, you’ll need to pay attention to the depth of field. Before going further with your lighting, test your depth of field once you’ve settled on and set your viewing location. If you need to sharpen the entire car, concentrating on the front and closing your aperture will lose depth of field at the front of the vehicle, when there’s nothing but empty space.
Automotive Photo Retouching Services
Sometimes it is okay to leave the editing part to Automotive Retouching Services. Try our professional photo retouching services at affordable prices and fast turnaround. We specialize in color and density correction, background replacement, removing unwanted reflections, and lots more.