Tips and Tricks to Fix an Underexposed and Overexposed Image
People like to showcase their interests, personal style, adventures and relationships, there is no better way to do it than through photography. Our photographs tell a lot about what we find fascinating, beautiful, funny, important and inspiring.
Throughout the course of our journey, we all have shot images that we thought were perfect only for them to come out either underexposed or overexposed. Whether the problem is the flash or the lighting, you haven’t seen the last of photos that are either too dark or too bright.
To be a great photographer, light is the most critical element that you have to master. All the other factors like aperture, shutter speed and ISO are still important but the main pivot is light or exposure.
Although most basic image-editing programs have controls for tweaking the brightness or contrast of an image, my preference is the Adobe Photoshop tool as it offers much more precise fine-tuning. With Adobe Photoshop, I am also able to have more control over the shadows, highlights and mid-tones in my photo.
Here is a step-by-step guide on how to use Photoshop to fix overexposure or underexposure:
Step 1: Creating an adjustment layer
When you create an adjustment layer, you give yourself the option making further adjustments later if you need to. It also gives you more flexibility than you would have if you simply chose Adjustments and then selected Levels.
A Levels Adjustment Layer is created by clicking Adjustment Layer on the layers panel at the bottom. Then pick levels out of the drop-down menu.

Step 2: Adjusting the edges on the histogram
Once you click levels, it leads you to a new window where you will see a Histogram which represents the full range of light and dark pixels in the image.
There are three sliders below the histogram that are used for adjusting the light values in the image. There is the Black point on the left, the Midpoint in the middle and the White Point on the right.
To adjust and expand the image’s tonal range, simply drag the leftmost slider (Black Point) to the right of the histogram until it touches its edge. Then drag the rightmost slider (White Point) to the left for it to touch the opposite edge of the curve.
When you click OK, Photoshop will remap the lighting on your image and make the darkest pixels black and the lightest pixels white with the rest spreading proportionately in between.

Read Also – The Future of Artificial Intelligence in Photo Retouching 2022
Step 3: Adjusting the Mid-tones
While the adjustments above will largely improve the original image, you can still go a step further to bring out the finer details of the image.
Moving the midpoint slider to the left brightens the midtones of your image and vice versa. If the brightening causes you to lose some of the blacks, adjust this by pulling the Back Point further to the right or the White Point further to the left if you want the highlights to pop out some more.

Step 4: Clipping the shadows or highlights
Hold down the Option Key (Mac) or the ALT key (PC) while dragging the slider until colour starts to appear. The appearance of colour is an indication of pixels where highlights or shadows are getting clipped.

This process is by trial and error until get the kind of photo that you are happy with.
Step 5: Bottom line
While the process looks long on paper, it only takes seconds in Photoshop. And since you are using an Adjustment Layer, you can still change your mind later on and adjust these Levels again.
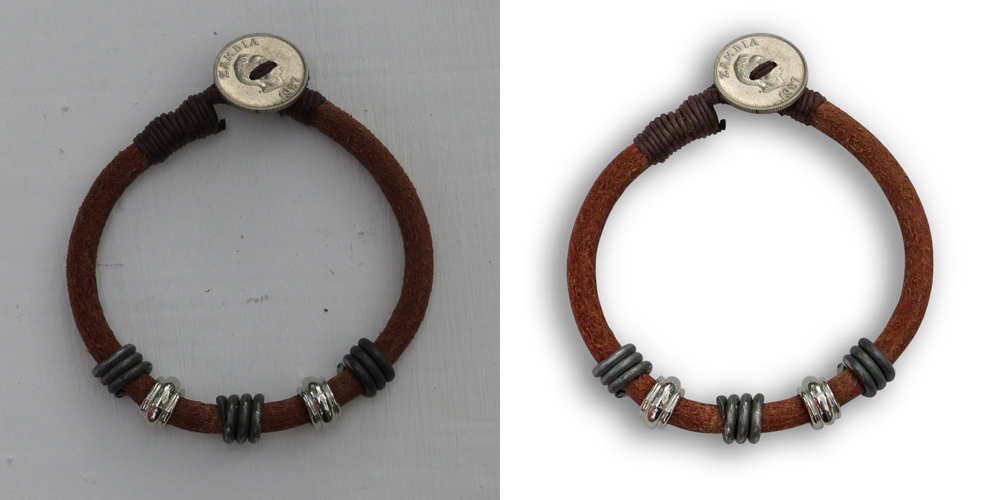
Are you new to photo retouching services and looking for a photo retoucher? Don’t worry Visit Digi5Studios. Digi5Studios specialize in Product photo retouching, Beauty retouching, Fashion photo retouching, Automobile photo retouching, Real Estate retouching, and Clipping Path Services.